概况
背景
ShowCase
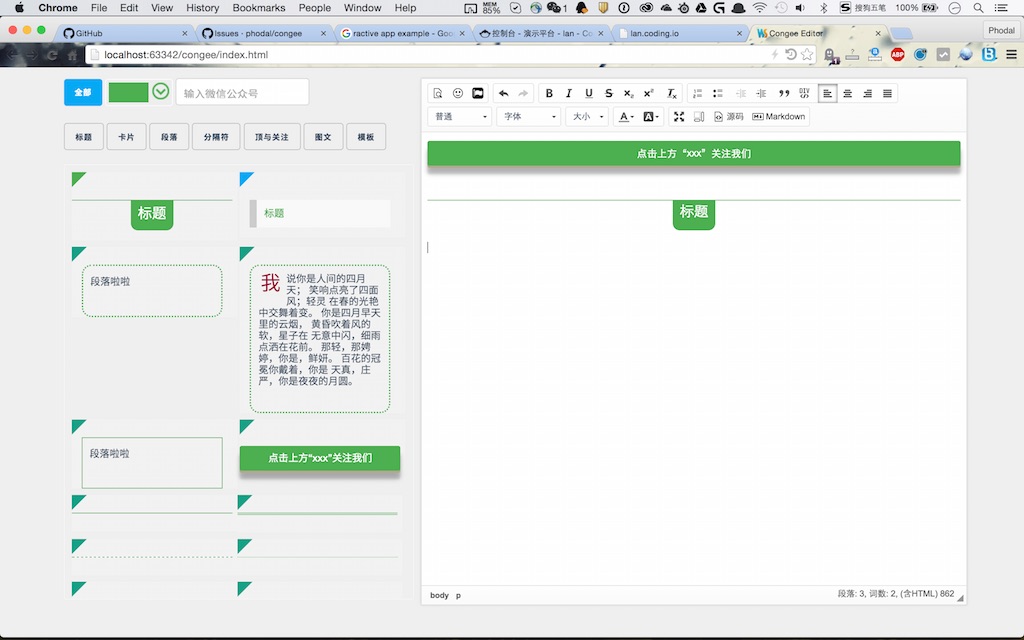
Screenshot
GitHub: https://github.com/phodal/congee
CKEditor + Ractive
选用怎样的前端框架是一个有趣的话题,我需要一个数据绑定和模板。首先,我排除了React这个框架,我觉得他的模板会给我带来一堆麻烦事。Angluar是一个不错的选择,但是考虑Angluar 2.0就放弃了,Backbone也用了那么久。Knockout.js又进入了我的视野,但是后来我发现数据绑定到模板有点难。最后选了Ractive,后来发现果然上手很轻松。
Ractive这个框架比React诞生早了一个月,还是以DOM为核心。Ractive自称是一个模板驱动UI的库,在Github上说是下一代的DOM操作。因为Virtual Dom的出现,这个框架并没有那么流行。
起先,这个框架是在卫报创建的用于产生新闻的应用程序 。有很多工具可以帮助我们构建Web应用程序 ,但是很少会考虑基本的问题:HTML,一个优秀的静态模板,但是并没有为交互设计。Ractive可以将一个模板插到DOM中,并且可以动态的改变它。
步骤
在创建这个项目的时候,我的迭代过程大致如下:
- 创建hello,world —— 结合不同的几个框架
- 创建基本的样式集
- 引用ColorPicker来对颜色进行处理
- 重构代码
Step 1: hello,world
下面是一个简单的hello,world。
  <script id="template" type="text/ractive">
    <p>Hello, {{name}}!</p>
  </script>

    <script>
    var ractive = new Ractive({
      template: "#template",
      data: { name: "world" }
    });
  </script>
这个hello,world和一般的MVC框架并没有太大区别,甚至和我们用的Backbone很像。然后,让我们来看一个事件的例子:
listView = new Ractive({
    el: "sandboxTitle",
    template: listTemplate,
    data: {color: config.defaultColor, "fontSize": config.defaultFontSize}
  });

  listView.on("changeColor", function (args) {
    listView.set("color", args.color);
  });
这是在监听,意味着你需要在某个地方Fire这个事件:
titleView.fire("changeColor", {color: color.toHexString()});
接着,问题来了,这和我们jQuery的on,或者React的handleClick似乎没有太大的区别。接着Component来了:
  var Grid = Ractive.extend({
    isolated: false,
    template: parasTemplate,
    data: {
    }
  });

  var dataValue = 5;
  var category = "category-3";

  var color = config.defaultColor;

  parasView = new Ractive({
    el: "parasSanbox",
    template: "<Grid Style="{{styles}}" />",
    components: {Grid: Grid},
    data: {
      styles: [
        {section_style: "border: 2px dotted #4caf50; margin: 8px 14px; padding: 10px; border-radius: 14px;", p_style: "font-size: 14px;", color: color,  data_value: dataValue, category: category},
      ]
    }
  });

  parasView.on("changeColor", function(args) {
    parasView.findComponent("Grid").set("Style.*.color", args.color);
  });
上面是在https://github.com/phodal/congee中用到的多个模板的View,他们用了同一个component。
对比和介绍就在这里结束了,我们就可以开始这个项目的实战了。
Step 2: Require.js模块化
同样的在这里,我们也使用Require.js来作模块化和依赖管理。我们的项目的配置如下:
require(["scripts/app", "ractive", "scripts/views/titleView", "scripts/views/hrView", "scripts/views/parasView", "scripts/views/followView", "jquery", "spectrum"],
  function (App, Ractive, TitleView, ParasView, HRView, FollowView, $) {
    "use strict";

    App.init();
    Ractive.DEBUG = false;
    var config = App.config;

    var titleView = TitleView.init(config);
    var hrView = HRView.init(config);
    var parasView = ParasView.init(config);
    var followView = FollowView.init(config);

    App.colorPicker(function (color) {
      hrView.fire("changeColor", {color: color.toHexString()});
      titleView.fire("changeColor", {color: color.toHexString()});
      parasView.fire("changeColor", {color: color.toHexString()});
      followView.fire("changeColor", {color: color.toHexString()});
    });

    $("input#mpName").keyup(function () {
      followView.fire("changeName", {mpName: $(this).val()});
    });
  });
在那之前,你自然需要先clone代码。然后在这里我们不同的几个模块进行初始化,并且为colorPicker配置了相应的监听事件。现在,让我们先到App模块中,看看我们做了些什么事?
Step 3: 初始化
初始化模块一共分为两部分,一部分是对CKEditor的初始化,一部分则是对colorPicker的初始化。
CKEditor初始化
CKEditor自身的编辑器配置比较长,我们就不在这里面列出这些代码了。
    var init = function () {
    /**
     * @license Copyright (c) 2003-2015, CKSource - Frederico Knabben. All rights reserved.
     * For licensing, see LICENSE.md or http://ckeditor.com/license
     */

    CKEDITOR.editorConfig = function (config) {
      // ...
    };
    var congee = CKEDITOR.replace("congee", {
      uiColor: "#fafafa"
    });

    congee.on("change", function (evt) {

    });

    congee.on("instanceReady", function (ev) {
      $(".tabset8").pwstabs({
        effect: "slideleft",
        defaultTab: 1,
        tabsPosition: "vertical",
        verticalPosition: "left"
      });
      $("#Container").mixItUp().on("click", ".mix", function (event) {
        var template = $(event.currentTarget).html();
        congee.insertHtml(template);
      });
    });

    $(document).ready(function () {
      $("#Container").niceScroll({
        mousescrollstep: 40
      });
    });
instanceReady事件主要就是在编程器初始化后进行的。因此我们在这里初始化了jQuery插件PWS Tabs,以及jQuery插件mixItUp,他们用于进行页面的排版。
ColorPicker初始化
下面的代码便是对ColorPicker进行初始化,我们设置了几个常用的颜色放在调色板上。
 var colorPicker = function (changeCB) {
    $("#colorpicker").spectrum({
      showPaletteOnly: true,
      togglePaletteOnly: true,
      togglePaletteMoreText: "more",
      togglePaletteLessText: "less",
      color: "#4caf50",
      palette: [
        ["#1abc9c", "#16a085", "#2ecc71", "#27ae60", "#4caf50", "#8bc34a", "#cddc39"],
        ["#3498db", "#2980b9", "#34495e", "#2c3e50", "#2196f3", "#03a9f4", "#00bcd4", "#009688"],
        ["#e74c3c", "#c0392b", "#f44336"],
        ["#e67e22", "#d35400", "#f39c12", "#ff9800", "#ff5722", "#ffc107"],
        ["#f1c40f", "#ffeb3b"],
        ["#9b59b6", "#8e44ad", "#9c27b0", "#673ab7", "#e91e63", "#3f51b5"],
        ["#795548"],
        ["#9e9e9e", "#607d8b", "#7f8c8d", "#95a5a6", "#bdc3c7"],
        ["#ecf0f1", "efefef"]
      ],
      change: changeCB
    });
  };
而实际上在这里我们已经完成了大部分的工作。
Step 4: 创建对应的View
在这个项目里,比较麻烦的地方就是使用同样的颜色来显示一个模板,如下的代码是用于显示水平线的模板:
{{#hrStyle}}
<div class="mix {{.category}}" data-value={{.data_value}}>
  <section {{#section_style}}style="{{.section_style}}"{{/section_style}}>
    <p style="{{.p_style}}{{#color}};border-color: {{.color}};{{/color}}"></p>
  </section>
</div>
{{/hrStyle}}
下面的代码就是对应的View:
      parasView = new Ractive({
        el: "sandboxHr",
        template: "<Grid hrStyle="{{styles}}" />",
        components: {Grid: Grid},
        data: {
          styles: [
            {section_style: "", p_style: "background-color: #fff;border-top: 1px solid", color: color,  data_value: dataValue, category: category},
            {section_style: "", p_style: "background-color: #fff;border-top: 3px double", color: color, data_value: dataValue, category: category},
            {section_style: "", p_style: "background-color: #fff;border-top: 1px dashed", color: color, data_value: dataValue, category: category},
            {section_style: "", p_style: "background-color: #fff;border-top: 1px dotted", color: color, data_value: dataValue, category: category},
            {section_style: "", p_style: "background-color: #fff;border-top: 2px dashed", color: color, data_value: dataValue, category: category},
            {section_style: "", p_style: "background-color: #fff;border-top: 2px dotted", color: color, data_value: dataValue, category: category},
            {section_style: "", p_style: "background-color: #fff;border-bottom: 1px solid #fff;border-top: 1px solid", color: color,  data_value: dataValue, category: category},
            {section_style: "border-top: 1px solid #8c8b8b; border-bottom: 1px solid #fff;", p_style: "content: "";display: block;margin-top: 2px;border-top: 1px solid #8c8b8b;border-bottom: 1px solid #fff;", data_value: dataValue, category: category},
            {section_style: "", p_style: "height: 6px;background: url("styles/images/hr/hr-11.png") repeat-x 0 0;border: 0;", data_value: dataValue, category: category},
            {section_style: "", p_style: "height: 6px;background: url("styles/images/hr/hr-12.png") repeat-x 0 0;border: 0;", data_value: dataValue, category: category},
            {section_style: "", p_style: "height: 10px;border: 0;box-shadow: 0 10px 10px -10px #8c8b8b inset;", data_value: dataValue, category: category},
            {section_style: "", p_style: "border: 0;height: 1px;background-image: -webkit-linear-gradient(left, #f0f0f0, #8c8b8b, #f0f0f0);background-image: -moz-linear-gradient(left, #f0f0f0, #8c8b8b, #f0f0f0);background-image: -ms-linear-gradient(left, #f0f0f0, #8c8b8b, #f0f0f0);background-image: -o-linear-gradient(left, #f0f0f0, #8c8b8b, #f0f0f0);", data_value: dataValue, category: category}
          ]
        }
      });
我们所做的只是拿出每个不同的布局,再将这些布局显示到页面上。最后在值被修改时,改变这其中的值:
parasView.on("changeColor", function(args) {
  parasView.findComponent("Grid").set("hrStyle.*.color", args.color);
});