1.定位文件
Project类中有一个file方法可以用来定位文件。
build.gradle:
File configFile = file("src/config.xml")
configFile = file(configFile.absolutePath)
println configFile.path
configFile = file(new File("src/config.xml"))
执行gradle -q命令:
D:GRADLE~2�112>gradle -q
D:gradle_product�112srcconfig.xml
Welcome to Gradle 2.2.1.
To run a build, run gradle <task> ...
To see a list of available tasks, run gradle tasks
To see a list of command-line options, run gradle --help
虽然我们目录中没有srcconfig.xml。但是file方法仍然定位了该文件,且能正确输出文件的绝对路径。
从上面的脚本中可以看出,file方法可以接受字符串和File对象作为参数。file方法一般都会将项目的根目录作为默认的父目录,而不是当前工作目录。
2.文件集合-FileCollection
项目集合在gradle中用FileCollection接口来表示。而且gradle中很多对象都是实现该接口的,例如依赖配置就是实现该接口的。
调用Project.files()方法可以获得FileCollection实例,你可以传入任意数量的对象,然后会被转换为File对象的集合,下面创建一个FileCollection集合。
FileCollection collection = files("src/file1.txt",new File("src/file2.txt"),["src/file3.txt","src/file4.txt"])
上面的files方法里传入的参数真是“乱其八糟”的,有字符串,文件,文件集合。下面来看看文件集合的一些特性:
可迭代
文件结合是可迭代的,支持下面的操作:
as操作符:将集合转化为其他类型
+操作符:合并2个文件集合
-操作符:从一个集合扣除一个集合
看下面一个综合的例子:
FileCollection collection = files("src/file1.txt"
,new File("src/file2.txt"),
["src/file3.txt", "src/file4.txt"])
collection.each{File file ->
	println file.name
}
Set set = collection.files
Set set2 = collection as Set
List list = collection as List
String path = collection.asPath
def union = collection + files("src/file5.txt")
def different = collection - files("src/file5.txt")
执行命令:
D:GRADLE~2�112>gradle -q
file1.txt
file2.txt
file3.txt
file4.txt
Welcome to Gradle 2.2.1.
To run a build, run gradle <task> ...
To see a list of available tasks, run gradle tasks
To see a list of command-line options, run gradle --help
闭包和可回调方法
task list << {
	File srcDir
	// Create a file collection using a closure
	FileCollection collection = files { srcDir.listFiles() }
	srcDir = file("src")
	println "Contents of $srcDir.name"
	collection.collect { relativePath(it) }.sort().each { println it }
	srcDir = file("src2")
	println "Contents of $srcDir.name"
	collection.collect { relativePath(it) }.sort().each { println it }
}
build.gradle在之前的基础上添加了一个list任务,可以看到files方法中传入的是什么?是一个闭包代码块,然后当调用sort()方法来查询集合内容的时候,才会调用闭包代码块,所以srcDir写在了collection的定义后。
3.文件的树形结构-FileTree
FileTree接口继承于FileCollection接口,在gradle中有一些对象是继承FileTree,比如SourseSet。
获得FileTree对象
Project.fileTree方法,
FileTree tree = fileTree(dir: "src/main")
tree.include "**/*.java"
tree.exclude "**/Abstract*"
tree = fileTree("src").include("**/*.java")
tree = fileTree("src") {
	include "**/*.java"
}
tree = fileTree(dir: "src", include: "**/*.java")
tree = fileTree(dir: "src", includes: ["**/*.java", "**/*.xml"])
tree = fileTree(dir: "src", include: "**/*.java", exclude: "**/*test*/**")
第一个定义中,是将src/main目录(包括子目录的子目录)下的文件生成fileTree文件,包括以java结尾的文件,不包括已Abstract开头的文件。
第二个定义中,采用连写的方式,包括src目录下的所有的java文件。
第三个定义中,类似第二种,只是采用的方式是闭包形式来定义所包含的文件。
第四种-第六中,根据构造函数的重载特性,传入不同的参数创建的。
使用FileTree对象
task findTree(dependsOn:"create") <<{
	FileTree filtered = tree.matching{
		include "org/gradle/api/**"
	}

	FileTree sum = tree + fileTree(dir:"src/test")
	tree.visit{
		element ->
		println "$element.relativePath =>$element.file"
	}
}
task create {
	File testFile = file("src/test/java")
	testFile.mkdirs()

}
执行命令
D:GRADLE~2�112>gradle -q findTree
main =>D:gradle_product�112srcmain
main/java =>D:gradle_product�112srcmainjava
test =>D:gradle_product�112src est
test/java =>D:gradle_product�112src estjava
4.由压缩文件得到FileTree
针对压缩文件有2个方法zipTree和tarTree两个方法。
FileTree zip = zipTree("someFile.zip")
FileTree tar = tarTree("someFile.tar")
FileTree someTar = tarTree(resources.gzip("someTar.ext"))
5.指定输入文件的集合
compile{
	source = file("src/main/java")
}
compile{
	source = "src/main/java"
}
compile{
	source = ["src/main/java","../shared/java"]
}
compile{
	source={
		file("src").listFiles.findAll{
			it.name.endsWith(".zip")
		}.collect{
			zipTree(it)
		}
	}
}
上面的4中方式都是重新设置了source文件夹的位置,也就是输入文件的位置。
Project下还有一个source方法来定义输入文件。
compile{
	source "src/main/java","src/main/groovy"
	source file("../shared/java")
	source{
		file("src/test").listFiles()
	}
}
6.复制文件
继承Copy对象来复制文件
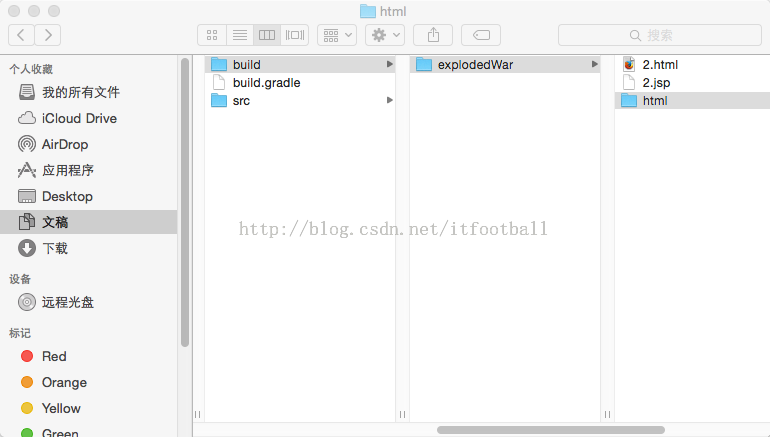
task copyTask(type:Copy){
	from "src/main/webapp"
	into "build/explodedWar"
}
from定义要被复制的文件目录,into定义的是复制到的目录。
from的来源有很多,类似files()
1.目录:目录下的所有文件都会包含在内
2.文件
3.不存在的文件:忽略
4.任务:任务的输出文件
into方法类似file方法
task copyTask(type:Copy){
	from "src/main/webapp"
	into "build/explodedWar"
}
task copyTaskWithPaths(type:Copy){
	from "src/main/webapp"
	into "build/explodedWar"
	include "**/*.html"
	include "**/*.jsp"
	exclude{
		details ->details.file.name.endsWith("/html")&&
		details.file.text.contains("staging")
	}
}
task anotherCopyTask(type:Copy){
	from "src/main/webapp"
	from "index.html"
	from copyTask
	from copyTaskWithPaths.outputs
	from zipTree(asserts.zip)
	into {
		getDestDir()
	}
}
任务copyTaskWithPaths可以来删选所选目录中的文件。
anotherCopyTask任务说明from的来源有多种形式。
还有一种复制文件的方式是调用Project的copy方法,需要注意的一点是,在任务中使用copy方法,必须显示的定义输入和输出文件。
task copyMethod <<{
        copy{
        from "src/main/webapp"
        into "build/explodedWar"
        include "**/*.html"
        include "**/*.jsp"
}
}
7.重命名文件
task rename(type:Copy){
        from "src/main/webapp"
        into "build/explodedWar"
        rename{
                String fileName->
                fileName.replace("1","2")
        }
}
上面的任务是将src/main/webapp目录下的文件移到build/explodedWar下,在移动后,将文件名为1的文件重命名为2。

task rename(type:Copy){
        from "src/main/webapp"
        into "build/explodedWar"
        rename{
                String fileName->
                fileName.replace("1","2")
        }
        rename "(.+)1(.+)","$1$2"
        rename(/(.+)1(.+)/,"$1$2")
}
第2个和第三个rename中,使用了正则表达式。$1表示表达式中第一个匹配项。
8.过滤文件
import org.apache.tools.ant.filters.FixCrLfFilter
import org.apache.tools.ant.filters.ReplaceTokens

task filter(type:Copy){
        from "src/main/webapp"
        into "build/explodedWar"
        expand(copyright:"2009",version:"2.3.2")
        expand(project.properties)
        filter(FixCrLfFilter)
        filter(ReplaceTokens,tokens:[copyright:"2009",version:"2.3.1"])
        filter{
                "[$line]"
        }
}
expand 和filter都是寻找一个叫token的东西,形式有点像@tokenName@
9.CopySpec的使用
复制规范形成一个层次结构。一份规范继承目的地路径,包括模式、排除模式,复制操作,名称映射和过滤器。嵌套复制:
task nestedSpecs(type:Copy){
        into "build/explodedWar"
        exclude "**/*staging"
        from("src/dist"){
                include "**/*.html"
        }
        into("libs"){
                from configurations.runtime
        }
}
但是执行的时候报错。是因为我们没有定义runtime的依赖,所以会报如下错误。
qianhuis-Mac-mini:0112 qianhui$ gradle -q nestedSpecs

FAILURE: Build failed with an exception.

* Where:
Build file "/Users/qianhui/Documents/Developer/gradle_project/0112/build.gradle" line: 8

* What went wrong:
A problem occurred evaluating root project "0112".
> Could not find property "runtime" on configuration container.

* Try:
Run with --stacktrace option to get the stack trace. Run with --info or --debug option to get more log output.
10 .Sync任务
同步任务继承与copy任务,当它执行的时候,将source文件copy到目标目录中,然后删除目标文件中不是copy过来的文件。
task libs(type:Sync){
        from configurations.runtime
        into "$buildDir/libs"
}
repositories{
        mavenCentral()
}

dependencies{
        runtime "junit:junit:4.11"
}
将runtime运行时所依赖的jar文件复制到build/libs目录下。
11.压缩文件
apply plugin:"java"
version = 1.0
task myZip(type:Zip){
        from "src"
}

println myZip.archiveName
println relativePath(myZip.destinationDir)
println relativePath(myZip.archivePath)
执行命令输出:
qianhuis-Mac-mini:0112 qianhui$ gradle -q myZip
0112-1.0.zip
build/distributions
build/distributions/0112-1.0.zip